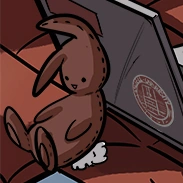
Señor Bunny is Bitty's beloved stuffed brown rabbit. When he is introduced, the team does not yet know he exists.[1] He was tragically involved in a juice-spilling incident in the spring semester of Bitty's sophomore year,[2] after which Bitty hid him under his shirt to take him to the bathroom and clean him up.[3] After Jack and Bitty begin dating, Jack presumably finds out about him as Señor Bunny can be visibly seen in Bitty's lap as they Skype and is in plain sight behind Jack when he sits on Bitty's bed.[4][5] The two later discuss where Senor Bunny is when Jack stops by unexpectedly after Bitty is upset over hiding their relationship, confirming that Jack knows. In that case, the two had left him in the window to watch the rain. Bitty subsequently takes him to Providence with him whenever Bitty spends time with Jack, such as the summer between Bitty's junior and senior years.
Señor Bunny
Señor Bunny Appearances[]
Year One
- In the back of comics #1, #2, #3, and #4
- Held in Bitty's lap in #8
- In the back of #16, apparently doing Bitty's homework
- Wearing a crimson ribbon in #17
- Tucked in with a Samwell pennant in #18
- Behind Bitty's laptop, in extra art from 9/2/14[6]
- Tucked into Bitty's bed in #21
- Hiding behind a stack of clothes in #22
Year Two
- Tucked in bed in #2
- Tucked in bed with a hockey puck in #3
- Wearing a bandana in #4
- Tucked under a book in #5
- Hiding behind the pillow in #6
- Tagging along with Bitty on the bus in #12
- Tucked in Bitty's bed in #16
- Sitting on Bitty's unmade bed in #17
Year Three
- On Bitty's bed, facing the window in #1
- On Bitty’s bed with a flash card in his hand, and in Bitty’s arms while Bitty Skypes with Jack in #3
- Behind Jack as Bitty sits in his lap and flirts in #5
- Hiding behind Bitty's pillow as Jack calls him back in #9
- Hiding behind Bitty's pillow as he's on the phone with Jack, between Bitty's arms as Jack wakes him up and later abandoned next to his phone in #10
- Sticking up from under Bitty's pillow as he wakes Jack up from a nap in #12
- His ears seen in a picture Bitty looks at while reflecting in #20
- His ears and the top of his head seen poking out from under Bitty's pillow while Jack reviews game tape in #24
Year 4
- Partial picture of him showing his ears and part of the top of his head in the background of #2
- Part of his head and an ear lying on Jack and Bitty's bed near Bitty's charging phone in #3
- The top of his ears visible as Bitty makes his social media accounts private in #5
- Tucked into bed with the top of his ears visible from under Bitty's covers as Bitty records his first vlog of his senior year in #6
- Head poking out from beneath the covers, apparently asleep, when Bitty and Jack are discussing Whiskey before bed in #10
- Ears and tail peaking out from beneath Bitty's right leg as he reads the Samwell Daily on his cell phone before interrupted by Chowder in #13
- Under the covers next to Bitty as he wakes up in Madison in #14
- Under Jack's arm as he lies in bed with Bitty in #16
- Behind the books on Bitty's bed as he talks about the team forcing Bitty to write his thesis in #17
- Lying facedown on Bitty's pillow as Bitty gives his dibs to Whiskey and after Whiskey leaves in #23